The forecast is ominous: Sometime on Wednesday, the massive Hurricane Beryl, currently a category 4 storm, will likely hit Kingston, Jamaica with sustained winds of more than 145 […]
Dennis Bovell (Matumbi) in dub: A Step by Step Guide

Learn the basics of setting up a dub session from lovers rock / reggae legend Dennis Bovell.
Originally published in the December, 1977 issue of London-based Sounds magazine, Dennis Matumbi in dub: A Step by Step Guide is a primer from the UK reggae legend himself on how to properly set up a studio for dub mixing. The interview was conducted by the great Vivien Goldman, who, in addition to being an influential music journalist, also contributed vocals and writing on classic records with Prince Far-I, New Age Steppers, The Flying Lizards, Massive Attack, as well as her own release on 99 Records.
The information presented below is basic, but includes crucial notes for anyone looking to get into dub mixing. For everyone else, it’s always interesting to hear artists talk about their craft. Bovell has an especially charming way of describing dub music and shares a number of gems throughout the article including likening the rhythm guitarist to a two-sided Gemini character and the echo sounds to bees…
Revisit our feature How British dub producer Dennis Bovell upended post punk and dub in the UK.
1. I’m patching in the 16-track machine, the echo machine and the reverb into the plugboard. That brings the tape off the 16-track machine behind me, looping the information off the tape synchronisation and patching all 16 tracks through to the desk (mixing board). Then I can equalise the tracks, that means get all the levels balanced.
2. This is the tape echo which gives repeat. I’m limiting the echo with my left hand so it doesn’t distort.
3. That machine on my right captures all that I’m doing. After I’ve plugged in the echo machine and lined it up I set the phaser and the graphic equaliser, as you can see on the picture. That’s what makes the sound go from left to right, like the balance knob on your amp at home. It bends, or phases all the bass to the finest treble. See how the machine I’m working on’s divided in 2? The section on top together with the bit I’m kneeling by is what gives that phased effect that sounds like an aeroplane flying across the room. I set the machine to a mellow feel… when the echo goes from left to right across the speakers it sounds like a train going through the room, and when it phases as it goes, it sounds like an aeroplane – see it deh? Earth and sky…
Those dials on the right-hand machine are the PPM meters, they show you the level of sound that’s going on the tape. 0 is no sound, and about the highest you can go with reggae music is 6 db (decibels) because reggae bass is so heavy. It’s different with rock. When the bass is that heavy, if the level goes any higher than 6 it makes the grooves on the record interlock when you’re cutting it. Here I’m recording for a master tape, so the speed is 15 i.p.s. (inches per second). Any slower and you get hiss on the tape. That’s why you get better sound quality on 12″ singles, because there’s more room to smear the music right across the plastic.
4. I’m testing the phase and echo sound. Yeah! It works. With my right hand I’m flicking the echo in and out on the patching board, and I’m flicking the phase in with my left hand.
5. I’m about to start setting the faders… Go deh!
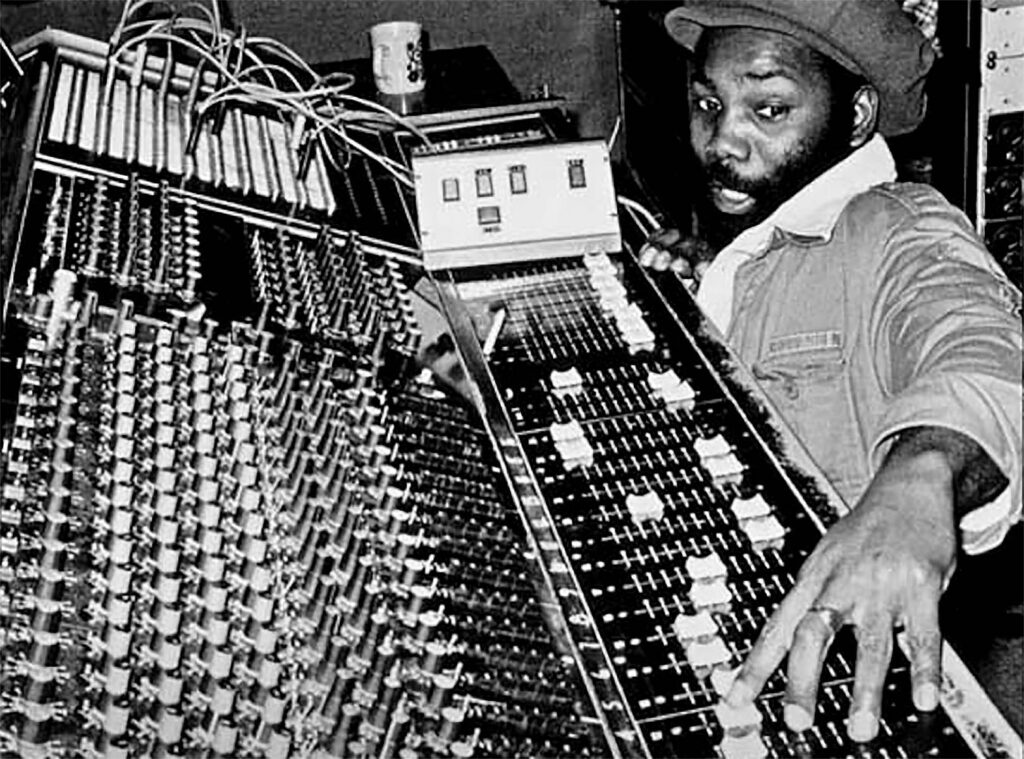
You look again, the rhythm is running smooth, and now there’s little picks of echo I rip off by the wayside as the rhythm chucks along. Time for a hot dub now!
6. Now we’re getting into the equalisation tricks. I’m going along one track at a time, each instrument individually, to give it its tone/sound balance. The box at the back is a remote control unit. I can take it with me as I go along the board and it controls the 16-track machine. You see, I’m recording on a 2″ tape which can carry up to 16 different instruments. The desk has 24 different channels.
I’ll explain to you what all the different knobs on the desk do.
The top line is the master volume, which controls the sound level in a different way from the faders (they’re the sliding things I’m pushing with my right hand). The top buttons just make sure the sound doesn’t go over 6db, the faders are more for precise volume control on each so there is no distortion and no instruments peaking above 6db. The next 4 buttons down are equalisation. Notice how each line of buttons goes straight to the corresponding fader.
The equalisation ranges from high frequency (called hf, at the tops of that second section of knobs) that’s what gives that sssssssss sound, very fine treble.
Next down is the mid-range, controlled by the next 2 knobs. Mid-range goes from top to bottom treble sound.
The bottom-most of the four knobs is bass, that’s low frequency (lf), very deep.
See the way all those four knobs are to different colors? The top’s red and the bottom’s black. You set the bottom half to get the sound roughly, and then you set the top just to skim the top off the sound, to make it more fine, the exact right sound on each instrument.
It usually takes me about 20 minutes to set up the board. I put the drum tracks on the far left of the board, the rhythm section in the middle, and the vocals at the far right.
Now there’s the bottom section of the knobs. The top row here controls the echo sound. See how these knobs are also divided in 2? The top’s the cue send, the bottom’s the cue return.
If I turn the top of those knobs, I get echo on that instrument – one turn is one repeat, two turns is two echos and so on. It’s also activated by that little switch you can just see immediately above. The first switch is for the four knobs above. If I don’t want to change the equalisation I’ve worked out when I’m missing, I’ll leave the switch off and let the equalisation that’s already on the tape come through. You see, the tape recorder’s got two heads – the synch head, to synchronise all the tracks in time together, and the playback head which gets a fatter tone to the sound.
The second switch controls the echo buttons, supplementing the knob underneath. Again, it means I can put any amount of echo on any track.
Back to the knobs – the second to bottom line controls the reverb. That’s what gives the spacious effect in stereo. You can turn it to get the exact amount of reverberation you want on every instrument. I never use it on the bass drum because it makes it sound muddy when you want it to hit solid and clear. I put a lot of reverb on the snare drum, it gives it that clicking hollow wooden sound. I want it to to sound as if it’s in a big room. There’s a track each for bass, snare, hi hat, one for each cymbal, and three for the toms – floor, floating and hanging toms, that is. You can make the drummer tighter in the studio than he was when he was actually playing, see it?
Now for the bottom line. That’s the pan. Panning the instruments from one speaker to the other is specially essential in dub, of course, shifting the sound from the left hand speaker to the right. Of course, you can shift each instrument individually. It’s like presence control, you can make the sound move forward or back as you want it. The organ goes on the left, and the piano goes on the right – that’s already the basic rhythm that makes you want to dance, you’re already rocking in stereo!
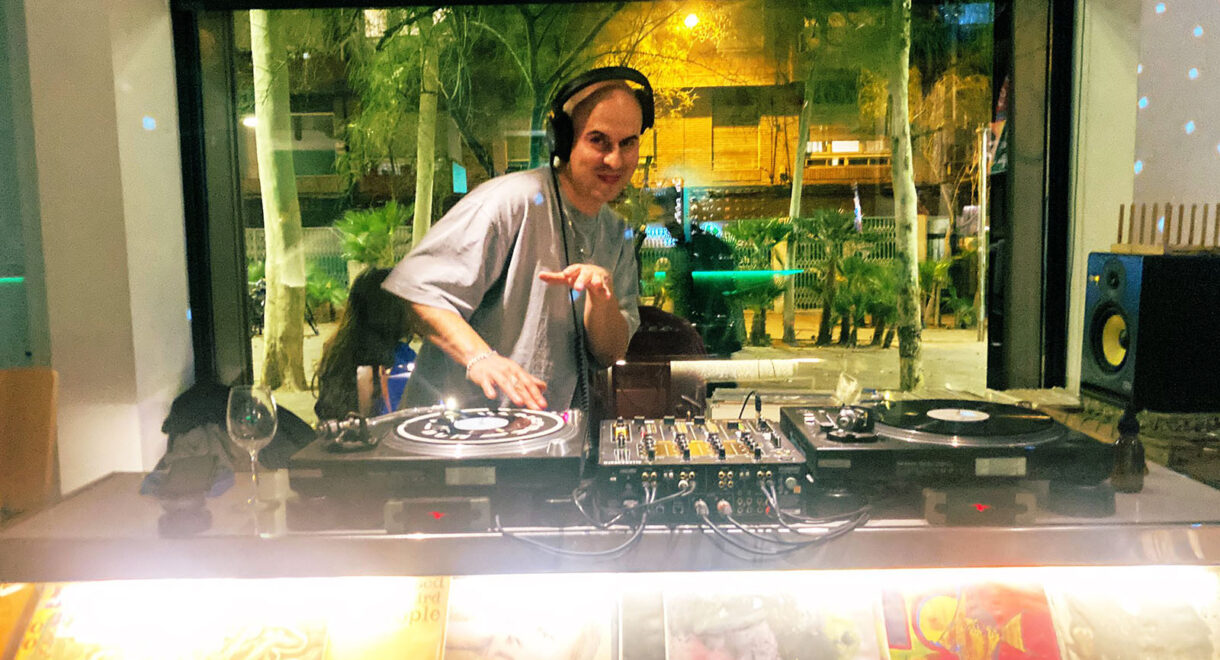
7. Me start mix now the tape start run. I’m keeping in tune with the music while I’m mixing. I rock and t’ing, and one, two time I fell off my chair ‘cos the rhythm touch my head just after the drum and bass start to rock. The snare is under heavy manners, murderer reverb! It start sound like gunshot, it have fire, you understand? On the picture, me just touch it to bring in the rhythm guitar and piano for a touch of echo, just let it go, and hear it…
You have to make sure that no instruments covers any other instrument, each one keeps its own time within the timing of the song. We have a picking guitar in reggae that acts like the fullback in football. You know how the fullback guards the goals while the other players are out deh on the field? The fullback covers all the other players? The picking guitar plays the same as the bass guitar but way up high, it covers every bass note. So if the bass drum is covering the bass guitar, flattening the sound, you make sure that you have the picking guitar up loud so that the bass guitar line isn’t drowned out. It is only noticeable when the drum covers the bass.
The rhythm guitar is like the policemen of reggae because it keeps all the other instruments in check. It’s like a Gemini character, two-sided, you know? One minute it’s playing with the organ, another minute it rocks with the piano.
The piano plays off the beat, the organ plays the double beat, and the sound rocks between the two.
8. After the first furlong! You look again, the rhythm is running smooth, and now there’s little picks of echo I rip off by the wayside as the rhythm chucks along. Time for a hot dub now! is bass time, drum an’ bass have fe get ugly, with WICKED echo running ‘pon the snare drum, and little filters of echo ‘pon the hi hat. It’s ites (heights) of dubbing now. In the picture me just a fall off my chair when the bees just lick and touch me in my bones…
In Sheep’s Clothing is powered by its patrons. Become a supporter today and get access to exclusive playlists, events, merch, and vinyl via our Patreon page. Thank you for your continued support.
